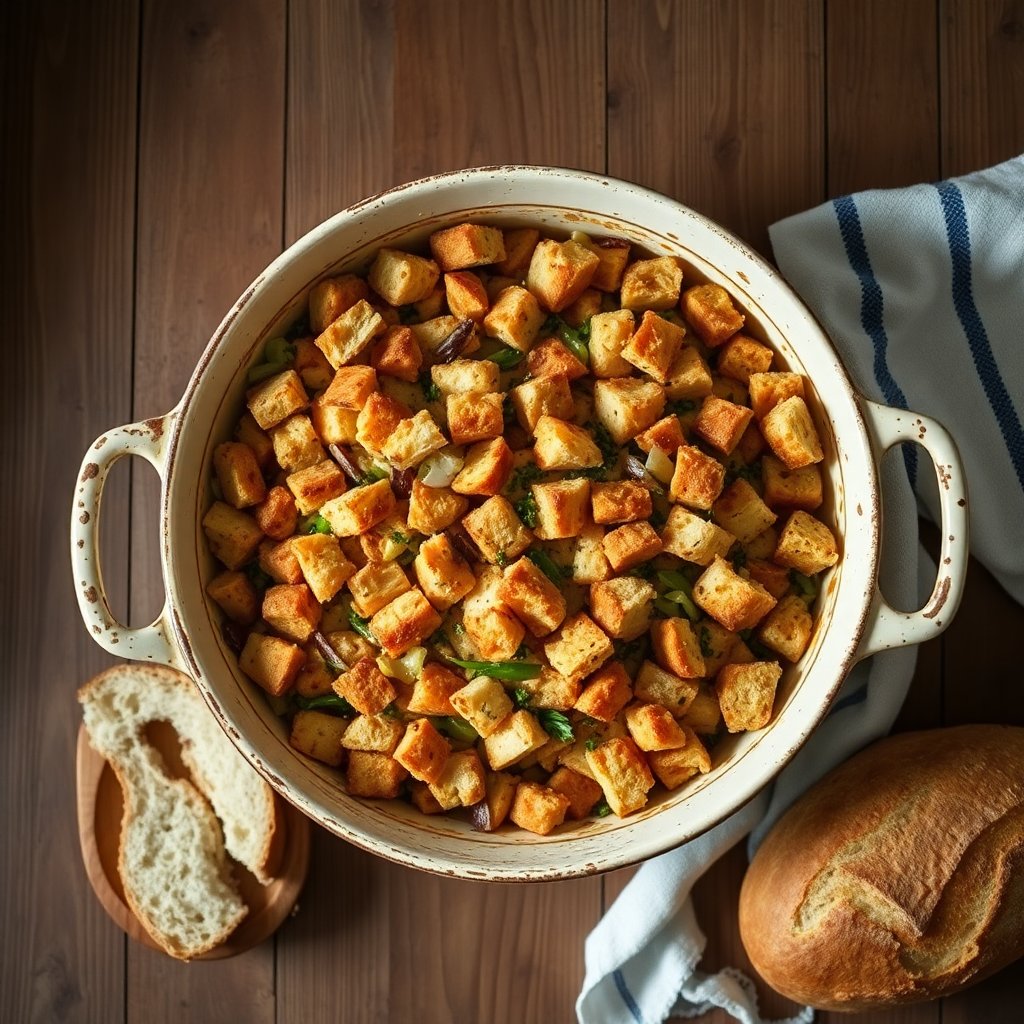
Thanksgiving 2026 lands on Thursday, November 26, which gives a sourdough baker ten days to plan one of the most forgiving dishes on the table. Stuffing (or dressing, depending on where you grew up) is basically a bread pudding with herbs and stock. The bread you choose decides most of the result, and a well-fermented sourdough loaf is about as good as it gets.
Sourdough brings three things a soft sandwich loaf cannot. The open, chewy crumb holds its shape after it soaks up stock. The crust adds texture that survives the oven. And the mild tang cuts through a plate of gravy, butter and turkey in a way plain white bread never will.
This guide covers how to choose and dry the bread, a base recipe you can adjust, a make-ahead timeline that frees up oven space on the day, and the handful of tools that make the job easier.
Affiliate disclosure: Crumbwise earns a small commission on qualifying purchases made through Amazon links in this post, at no extra cost to you.
Why Sourdough Works So Well in Stuffing
Structure. A long-fermented loaf with good gluten development has thick cell walls. When you cube and dry it, those walls stay firm, so each cube absorbs liquid on the outside while keeping some chew in the middle. Enriched or very soft breads collapse into paste.
Flavor. Lactic and acetic acids from fermentation give sourdough a gentle sourness. In stuffing it reads as brightness rather than sourness, especially once butter, onions and sage come in.
It uses up loaves. If you bake every week, you probably have a heel or two hanging around. Stuffing is the best possible destination for bread that is a few days past its prime. Our guide to storing sourdough bread explains how to keep those loaves in good shape until you need them, including freezing.
Choosing the Loaf
Almost any lean sourdough works, but some are better than others.
- Classic country loaf (white with 10 to 20 percent whole wheat): The safest choice. Mild, sturdy and neutral enough for any add-ins.
- High-whole-grain or rye-heavy loaves: Great flavor, but they absorb more liquid and can taste heavy. Use them for up to a third of the bread and fill out the rest with a white loaf.
- Very high-hydration, open-crumb loaves: They work, but the big holes mean fewer cubes per loaf. Plan for a little extra bread.
- Seeded or olive loaves: Fine if you like the flavor. Sesame and sunflower seeds toast nicely in the oven.
- Sandwich-style sourdough with milk or butter: Softer, so dry it longer and use slightly less stock.
How much bread? For a standard 9x13 inch dish that serves 10 to 12 as a side, plan on about 1.5 pounds (680 g) of bread, which is roughly one large boule or two smaller loaves. That works out to about 14 to 16 cups of cubes.
Cubing and Drying the Bread
This is the step that matters most. Fresh bread soaks up stock unevenly and turns gummy. Dry bread soaks it up evenly and bakes into a custardy middle with a crisp top.
Cut the cubes. Aim for 3/4 to 1 inch pieces. Leave the crust on; it adds texture. A good serrated knife makes this go much faster and keeps you from crushing the crumb. If yours tears more than it slices, our roundup of the best bread knives has options at a few price points.
Option 1, air dry (2 to 3 days ahead). Spread the cubes on sheet pans in a single layer and leave them uncovered on the counter for one to two days, tossing once or twice. They should feel firm and dry all the way through.
Option 2, oven dry (same day or up to a week ahead). Spread cubes on sheet pans and bake at 275 to 300°F for 30 to 45 minutes, stirring halfway, until they are dry and only lightly golden. Let them cool completely. Stored in a zip-top bag or airtight container, oven-dried cubes keep for about a week at room temperature, or for a couple of months in the freezer.
A quick test: Squeeze a cube. If it springs back like fresh bread, it needs more time. If it feels like a crouton that is just starting to give, it is ready.
→ Shop rimmed half-sheet baking pans on Amazon
Base Sourdough Stuffing Recipe
This makes one 9x13 inch dish. Treat it as a template, not a rulebook.
Ingredients
- About 1.5 lb (680 g) dried sourdough cubes (14 to 16 cups)
- 8 tablespoons (113 g) unsalted butter, plus extra for the dish
- 2 medium yellow onions, diced
- 4 celery stalks, diced
- 3 cloves garlic, minced
- 2 tablespoons chopped fresh sage (or 2 teaspoons dried)
- 1 tablespoon fresh thyme leaves (or 1 teaspoon dried)
- 1/2 cup chopped fresh parsley
- 3 to 4 cups (720 to 960 ml) chicken or turkey stock, warmed (vegetable stock works too)
- 2 large eggs
- 1 teaspoon kosher salt, then adjust
- 1/2 teaspoon black pepper
Method
- Soften the aromatics. Melt the butter in a large skillet over medium heat. Add onion and celery with a pinch of salt and cook for 10 to 12 minutes until soft and translucent. Add garlic, sage and thyme and cook one more minute.
- Combine. Put the bread cubes in your largest bowl. Scrape the vegetables and butter over the top, add parsley, and toss.
- Add the liquid. Whisk the eggs into 3 cups of warm stock with the salt and pepper. Pour it over the bread in two or three additions, folding gently. Let it sit 10 minutes. If dry patches remain, add more stock a splash at a time. You want every cube moistened but no pool of liquid in the bottom of the bowl.
- Bake. Transfer to a buttered 9x13 dish. Cover with foil and bake at 350°F for 30 minutes. Uncover and bake another 20 to 30 minutes until the top is deep golden and crisp at the edges.
- Check the temperature. Because this recipe contains eggs and poultry stock, the center should reach 165°F on an instant-read thermometer.
→ Shop 9x13 ceramic baking dishes on Amazon
→ Shop instant-read kitchen thermometers on Amazon
Variations Worth Trying
Sausage and apple. Brown 1 pound of bulk pork or Italian sausage before the vegetables, then cook the onion and celery in the rendered fat with a little less butter. Fold in one diced tart apple with the bread.
Mushroom and leek (vegetarian). Replace the onions with 2 large leeks and add 1 pound of mixed mushrooms, cooked until browned. Use vegetable stock and a splash of dry sherry.
Cranberry pecan. Add 3/4 cup dried cranberries and 3/4 cup toasted pecans. This one pairs nicely with a loaf that has a bit of whole wheat or rye.
Chestnut and herb. Fold in a cup of roasted, chopped chestnuts and double the parsley. Classic and a little more festive.
Discard-friendly cornbread mix. If you keep a jar of discard, a discard cornbread cut into cubes and dried can stand in for up to half the sourdough. It adds sweetness and a softer, crumblier texture.
Your Make-Ahead Timeline for Thanksgiving 2026
The oven is the bottleneck on Thanksgiving. Stuffing is one of the easiest dishes to move earlier in the week.
Saturday, Nov 21 to Sunday, Nov 22: Bake the loaf you plan to use, or pull a frozen one out of the freezer. A loaf baked a few days ahead is ideal for stuffing.
Monday, Nov 23: Cube the bread and either air dry it or oven dry it. Store dried cubes airtight once cool.
Tuesday, Nov 24: Chop onion, celery and herbs. Store them in containers in the fridge. If you are making a sausage version, brown the sausage now and refrigerate it.
Wednesday, Nov 25: Cook the aromatics and assemble the whole dish, including the egg and stock mixture. Cover tightly and refrigerate overnight. An overnight rest actually helps the bread absorb liquid evenly.
Thursday, Nov 26: Take the dish out of the fridge about 30 minutes before baking. Bake covered for 35 to 40 minutes (a little longer because it starts cold), then uncovered until golden and 165°F in the center. If the turkey is resting, that is your window: the bird can sit under foil for 30 to 45 minutes while stuffing bakes.
If you are also baking rolls, our make-ahead sourdough dinner rolls guide fits into the same schedule, with shaping on Wednesday and a final bake on Thursday morning.
Inside the Bird or in a Dish?
Many families have strong opinions here. From a food safety and consistency standpoint, baking in a dish is the easier path. The USDA's Food Safety and Inspection Service recommends cooking stuffing separately for the most even doneness, and notes that stuffing cooked inside a bird must also reach 165°F in the center, which often means the turkey meat overcooks while you wait. You can read the full guidance on the USDA FSIS stuffing and food safety page.
A middle ground: Bake the stuffing in a dish, then spoon a cup or two of pan drippings from the roasted turkey over the top for the last 10 minutes. You get much of the flavor without the timing headache.
Troubleshooting
Soggy, heavy stuffing. Usually the bread was not dry enough or there was too much stock. Next time, dry the cubes longer and add liquid gradually. To rescue a soggy batch, bake it uncovered longer at 375°F so the top crisps.
Dry, crouton-like stuffing. The bread was very dry or the stock ran short. Drizzle warm stock over the top and return it to the oven, covered, for 10 minutes.
Bland flavor. Stuffing needs more salt than you think because bread and stock absorb so much. Taste the stock and egg mixture before pouring; it should taste slightly over-seasoned on its own. If your stock is unsalted, increase the salt to around 1.5 teaspoons.
Too sour. A very tangy loaf can dominate. Cut it with a portion of milder bread, or add a little sweetness from apple, dried cranberries or caramelized onions.
Tools That Make It Easier
You do not need anything special, but a few items help a lot when you are cooking for a crowd:
- A serrated bread knife for clean cubes without crushing the crumb.
- Two rimmed sheet pans so you can dry a full batch at once.
- A large mixing bowl (6 quarts or more) so you can fold without crushing the bread.
- A 9x13 baking dish with a lid, which makes overnight storage and transport to a relative's house much simpler.
- An instant-read thermometer to confirm 165°F instead of guessing.
→ Shop baking dishes with lids for transport on Amazon
Leftover Stuffing Ideas
Leftovers should go into the fridge within two hours of serving, and they keep for about three to four days. Reheat to 165°F. A few favorite ways to use them up:
- Stuffing waffles. Press cold stuffing into a hot, greased waffle iron until crisp. Top with a fried egg and leftover gravy.
- Stuffing cakes. Mix with one beaten egg, form patties and pan-fry in butter.
- Turkey and stuffing strata. Layer with chopped turkey, pour over an egg and milk custard, and bake for an easy Black Friday brunch.
The Bottom Line
Sourdough stuffing is mostly about patience with the bread. Pick a sturdy loaf, dry the cubes properly, add stock gradually, and bake until the center hits 165°F. Do the cubing on Monday and the assembly on Wednesday, and Thanksgiving Day becomes a matter of sliding a dish into the oven while the turkey rests. Whatever loaf you bake this week, save a little extra for the stuffing. It may end up being the dish people ask about first.
As an Amazon Associate we earn from qualifying purchases. This article contains affiliate links; if you buy through them we may earn a small commission at no additional cost to you.