
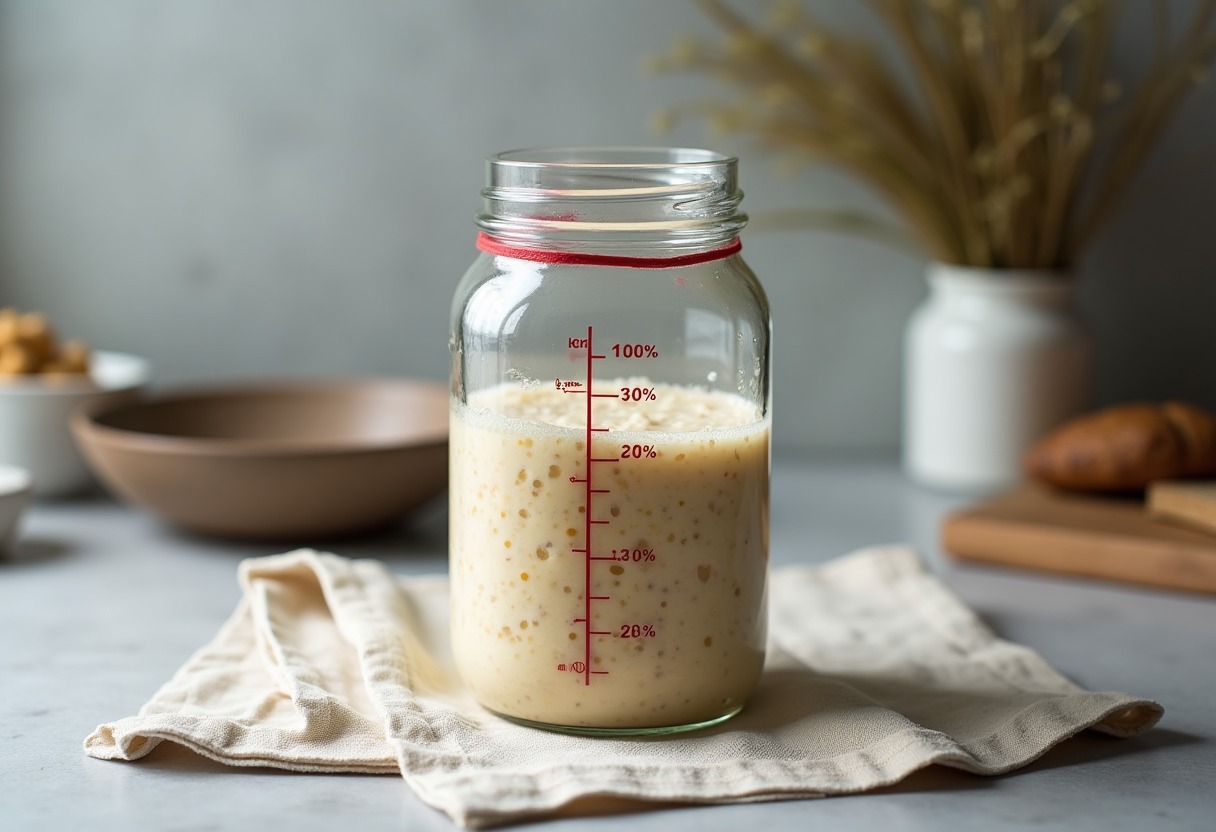
Your starter looks bubbly and smells right, but that doesn't mean it's ready to leaven bread. Using a starter before it reaches peak activity means flat loaves, dense crumb, and wasted flour — using it after the peak means weak fermentation and sour flavors you didn't ask for. The window matters more than most bakers realize.
Why Peak Activity Timing Controls Your Bread
Sourdough starter reaches maximum leavening power when its yeast population is most active and its gluten-digesting enzymes haven't yet broken down too much structure. According to King Arthur Baking's sourdough starter research, this peak typically occurs 4-12 hours after feeding at room temperature, depending on your starter's strength, feeding ratio, and ambient temperature.
Before peak, the yeast colony hasn't multiplied enough to produce sufficient CO₂. After peak, the population crashes as food runs out, acid accumulates, and the starter begins to collapse. Your bread needs that narrow window when gas production is highest and the starter structure is still strong enough to trap it.
Temperature shifts this timing dramatically. A starter at 78°F peaks roughly twice as fast as one at 68°F. If you're working with sourdough starter temperature control methods, you can slow or accelerate this window to match your schedule.
The Five Reliable Signs of Peak Activity
Volume increase: A ready starter doubles or triples in height from its post-feeding level. Mark your jar with a rubber band at the starting point immediately after feeding. → Shop rubber bands jar markers on Amazon to track this precisely. If you're using one of the 2026 03 28 Best Sourdough Starter Jars, the measurement lines make this even easier.
Dome shape at surface: Peak starters form a slightly convex top, sometimes with larger bubbles just beginning to break through. Once the surface goes flat or concave, you've missed the window — the structure is collapsing as the yeast exhausts its food supply.
Bubble structure: Look for abundant small to medium bubbles throughout the mass, visible through the jar sides. Large irregular holes mean you're past peak. No bubbles or only tiny ones near the surface mean you're not there yet.
Aroma shift: At peak, the smell should be pleasantly yeasty, slightly sweet, and mildly tangy — like yogurt or beer. An intensely sharp, vinegary, or acetone-like smell indicates overfermentation. New starters may smell more acidic; established ones develop a more balanced profile.
Consistency change: The texture becomes light, airy, and almost mousse-like at peak. Stir it gently with a spoon — it should feel loose and webby from gluten development, not dense or liquidy. A layer of clear liquid (hooch) on top means you're well past peak.
Testing Methods: Float Test and Beyond
The float test works because a starter at peak activity has trapped enough CO₂ to become buoyant. Drop a teaspoon of starter into room-temperature water. If it floats, gas production is strong enough to leaven bread. If it sinks immediately, keep waiting. If it sinks slowly or hovers mid-depth, you're close but not quite there.
This test has limits. Overhydrated starters (above 125% hydration) sometimes fail to float even when ready. Very stiff starters (50-75% hydration) may float early because their dense structure traps gas differently. The float test works best for 100% hydration starters — equal parts flour and water by weight.
Fill a clear glass with water and test a small sample. → Shop clear glass containers baking on Amazon for reliable test vessels. If you're tracking multiple variables, a digital kitchen thermometer helps correlate temperature with readiness patterns over time.
For a more technical approach, pH measurement reveals fermentation stage. Peak activity typically occurs between pH 3.8-4.2. Below 3.8 means overfermentation and excess acid; above 4.5 means underfermentation. → Shop pH test strips on Amazon if you want this level of precision, though visual and physical signs work fine for most bakers.
Peak Activity vs. Other Readiness Indicators
| Sign | At Peak | Before Peak | After Peak | |----------|-------------|-----------------|----------------| | Height | 2-3x original volume | Less than 2x volume | Shrinking or collapsed | | Surface | Slightly domed, intact | Flat with small bubbles | Concave or separated | | Smell | Yeasty, mildly tangy | Flour-like, little aroma | Sharp, vinegary, alcoholic | | Float test | Floats easily | Sinks immediately | May float but structure weak | | Bubble size | Small to medium, uniform | Few or tiny bubbles | Large irregular holes |
Understanding where your starter sits on this timeline changes how you plan your bake. If you feed at 8 AM and your starter usually peaks at 2 PM, you start mixing dough at 1:30 PM — not when it "looks bubbly" or when your recipe tells you to begin. The starter dictates timing, not the clock.
Product Recommendations for Tracking Starter Readiness
Marked storage jars: Clear glass jars with volume measurements eliminate guesswork. The graduated markings let you see exactly when doubling occurs. Straight-sided containers show expansion more accurately than tapered ones. Read our full breakdown in 2026 03 28 Best Sourdough Starter Jars.
Rubber bands or jar markers: → Shop sourdough starter jars with measurements on Amazon for pre-marked options, or use silicone bands to mark your existing jars at feeding time. Position one at the starter surface immediately after feeding, another at the expected doubling point.
Temperature monitoring: Starter activity is temperature-dependent. A simple probe thermometer stuck to your jar with tape shows you what environment your yeast is actually working in, not what your kitchen thermostat claims. Pair this with the guidance in Sourdough Starter Temperature Control to dial in consistency.
pH strips (optional): For bakers troubleshooting stubborn starters or working with unfamiliar flours, pH testing adds objective data. You'll learn your starter's patterns faster than relying on appearance alone.
Clear test glasses: Small juice glasses or lab beakers work perfectly for float testing. Reusable, easy to clean, and you can watch the starter sample from all angles as it sinks or rises.
What Most Guides Miss About Readiness Timing
Your feeding ratio shifts peak timing more than ambient temperature. A 1:5:5 feeding (1 part starter, 5 parts flour, 5 parts water) takes 8-12 hours to peak at 70°F. A 1:1:1 feeding peaks in 4-6 hours under the same conditions. Higher ratios dilute the starter population, requiring more time for yeast to multiply back to peak density. This matters enormously for planning overnight or workday bakes.
If you need your starter ready at a specific time, work backward from that deadline. Want to mix dough at 6 PM? Feed at 10 AM with a 1:5:5 ratio if your kitchen sits at 68-70°F. Feed at 2 PM with a 1:1:1 ratio in the same conditions. Check our detailed timing strategies in Sourdough Starter Feeding Ratios Guide.
Flour type affects peak speed. Whole grain flours (whole wheat, rye, spelt) feed yeast faster than white flour due to higher mineral and enzyme content. A 100% whole wheat starter peaks 1-2 hours faster than an all-purpose flour starter fed at the same ratio and temperature. If you're experimenting with different flours, review Best Flour For Sourdough Starter to understand how each performs.
New starters take 5-7 days before they peak predictably. During establishment, they bubble erratically, smell strange, and don't follow normal timing patterns. Don't expect reliable readiness signs until the starter has been fed daily for at least a week. The full maturation process is covered in Sourdough Starter Complete Guide.
Some bakers use their starter slightly before peak — at 75-80% of maximum rise — when working with high-hydration doughs or long bulk fermentations. The slightly less vigorous starter ferments more slowly during the early dough stages, giving you more control and less risk of overproofing. This technique appears frequently in professional bakeries but rarely in home baking guides.
FAQ
How long does peak activity last? Peak lasts 30 minutes to 2 hours depending on feeding ratio, temperature, and starter strength. Stiff starters hold peak longer than liquid ones. Once you see the surface flatten or bubbles coarsen, you have maybe 30 minutes before leavening power drops noticeably.
Can I use my starter if it floats but hasn't doubled? Probably not. The float test confirms gas production, but if the starter hasn't doubled, the yeast population may be too small to leaven a full batch of dough. Wait for both volume increase and float success before mixing.
What if my starter smells like alcohol at peak? That's normal for starters fermented at cooler temperatures or with lower feeding ratios. The smell comes from metabolic byproducts and doesn't mean the starter is bad. If it bothers you, increase your feeding ratio (more flour and water relative to starter) or raise the temperature slightly.
Does the float test work with whole grain starters? Yes, but whole grain particles are denser and sometimes sink despite adequate fermentation. Rely more on volume, dome shape, and bubble structure with whole grain starters. The float test serves as one data point, not the only one.
My starter peaks in 3 hours — is something wrong? Not necessarily. Very active mature starters in warm kitchens (75-80°F) with small feeding ratios (1:1:1 or 1:2:2) can peak that quickly. If the bread turns out well, your starter is fine. If you want a longer window, increase the feeding ratio or lower the temperature.
The Window Is Narrower Than You Think
Peak activity lasts less time than the climb to get there, and catching it becomes instinct once you've watched your specific starter through a dozen cycles.
Some links on this page are affiliate links. We may earn a small commission if you purchase through them, at no extra cost to you.
As an Amazon Associate we earn from qualifying purchases. This article contains affiliate links; if you buy through them we may earn a small commission at no additional cost to you.